How to Identify and Repair Water Damage Behind Drywall Before It Spreads Further
Water damage behind drywall is one of the most expensive hidden problems a home can develop, because the wall itself hides the evidence. By the time a stain appears on the surface, water may have been soaking the gypsum core, the paper facing, the insulation and the timber framing for weeks. The direct answer is straightforward: look for the early signs — stains, bubbling paint, a musty smell, soft spots and separating baseboards — confirm what you find with a moisture meter, find and stop the leak before you touch the wall, and replace any drywall that has gone soft or grown mould. Small, dry stains can sometimes be sealed and painted, but saturated drywall cannot be saved.
Why Drywall Hides Water Damage Until It Is Too Late
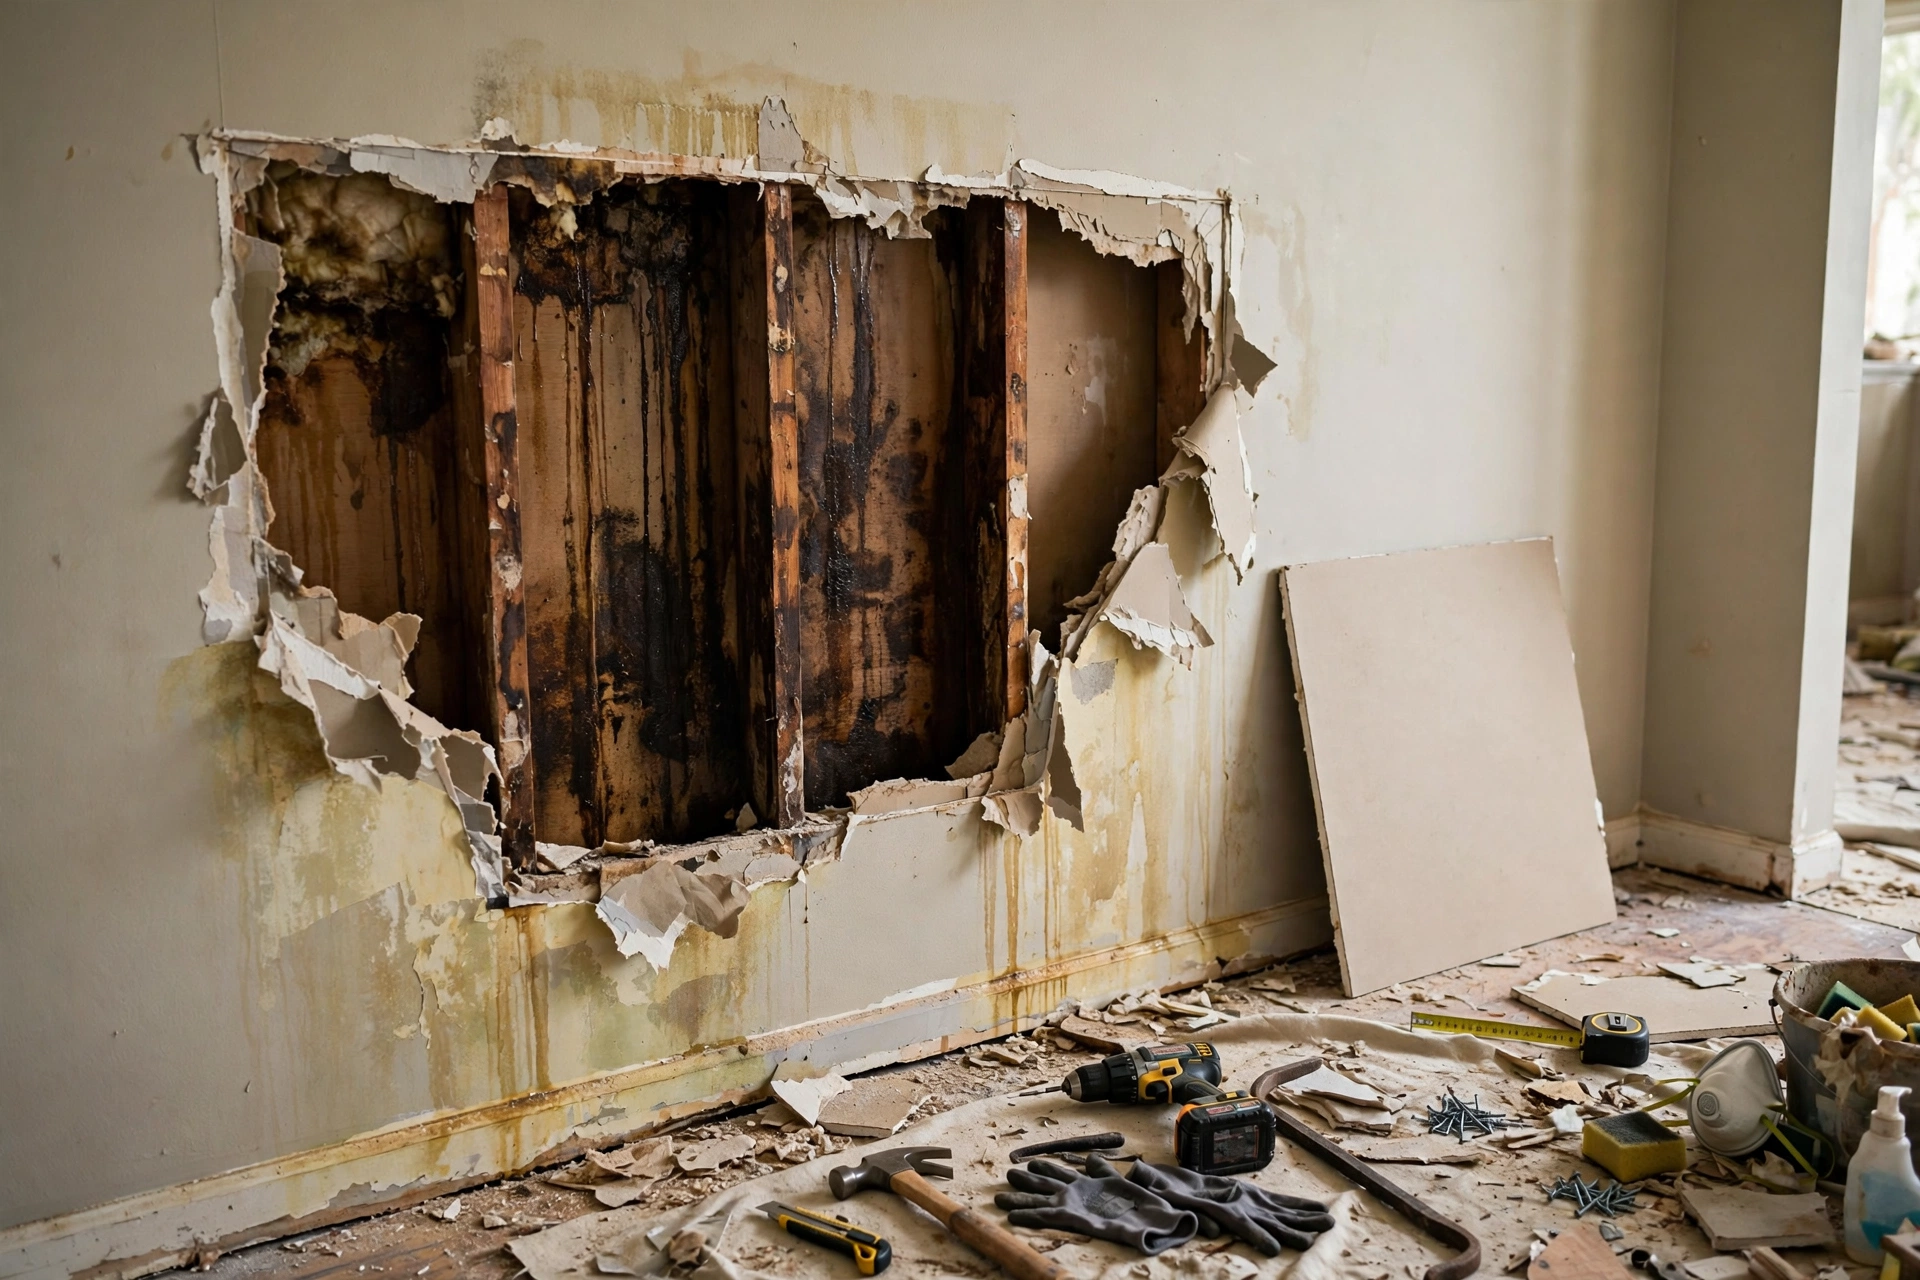
Drywall is essentially a gypsum core wrapped in paper, and both layers absorb water readily. A slow leak from a pipe joint, a dripping shower valve or a failed window seal can feed moisture into the wall cavity for months while the room looks normal. The paper facing is also food for mould, which is why a damp wall can start growing mould within a day or two of getting wet. Inside the cavity the damage spreads sideways and downwards: insulation sags and loses its effectiveness, timber studs and bottom plates begin to rot, and fixings rust and loosen. Because the wall surface is the last thing to show damage, homeowners often discover the problem only when paint bubbles, a baseboard pulls away or the wall feels soft under a fingertip. That delay is what turns a small plumbing repair into a wall rebuild, so the real skill is learning to read the quiet signs early.
What Are the Early Warning Signs of Water Behind Drywall?
Most hidden water damage gives itself away through a cluster of small clues rather than one dramatic event. One sign on its own may mean nothing — a single faint stain could be an old, fixed leak — but two or three signs in the same area almost always mean active water. Train yourself to notice changes rather than waiting for obvious damage, and check the same spots every few months, especially around bathrooms, kitchens and exterior walls.
- Yellow, brown or copper-coloured stains that grow or darken over time.
- Paint that bubbles, blisters, peels or cracks away from the surface.
- Wallpaper lifting or seams opening for no obvious reason.
- A musty, earthy smell that is strongest when you first enter the room.
- Drywall that feels soft, spongy or crumbly when you press it gently.
- Baseboards that swell, stain or pull away from the wall at the bottom.
- A patch of wall that feels cold or damp compared with the wall around it.
- A water bill that creeps up without any change in how much water you use.
What a Moisture Meter and Thermal Camera Can Tell You
A handheld moisture meter is the cheapest way to turn suspicion into evidence. Pin meters press two small probes into the surface and measure electrical resistance, which falls as moisture rises; pinless meters scan through the surface without leaving marks. As a rough guide, drywall readings above about 15 to 16 percent moisture content deserve investigation, and readings should always be compared with a dry area of the same wall so you are measuring a difference, not an absolute number. Take readings in a grid across the suspect area and mark the damp boundary with painter’s tape — that outline is exactly where a repair will need to reach.
A thermal imaging camera adds a second layer of evidence. Wet materials are usually cooler than dry ones because evaporation draws heat away, so damp patches show up as darker, cooler areas on the camera. A camera shows where to look rather than proving water is present, so it should be paired with meter readings rather than trusted on its own. Two low-cost checks also help: tape a square of aluminium foil over the suspect area and check after a day — moisture on the wall side points to water inside the wall, while moisture on the room side points to condensation — and watch your water meter with every tap and appliance off for an hour, since a moving meter means water is leaving the system somewhere.
Tracing the Leak Back to Its Source Before You Cut
Cutting into a wall before you know where the water comes from is guesswork that creates extra repair work. Start above and beside the damage, not in it: a stain on a ground-floor ceiling usually points to a bathroom or pipe run on the floor above, while a damp patch low on an exterior wall may come from a failed window seal, a blocked gutter or poor grading outside. Check the obvious culprits first — the pipes and traps under nearby sinks, the toilet base, the shower valve and the washing machine hoses — and look in the rooms above and below, since water travels along joists and pipes before it shows itself.
If the source is not obvious, use the water meter test described above to confirm whether the leak is in the supply plumbing, and check whether the dampness worsens after rain, which points to the roof, gutters or exterior envelope rather than a pipe. Condensation is the other suspect: in a cold corner with poor ventilation, warm moist air can condense inside the wall and mimic a leak. Once you have a likely source, fix it and let the wall dry before any cosmetic repair — patching over an active leak simply hides the problem until the stain returns.
Drying, Cutting and Replacing Water-Damaged Drywall Step by Step
Never start repairs until the leak is fixed and the wall is dry. Drywall that is still wet will not hold joint compound, and paint applied over damp gypsum will bubble within weeks. Set up fans and a dehumidifier, and give the area at least two to three days of steady drying, checking with a moisture meter until readings match a dry part of the same wall.
Mark the damaged area with a pencil, extending the outline at least 30 centimetres beyond the visible stain or soft patch.
Cut along the outline with a drywall saw, working carefully to avoid pipes and cables inside the cavity.
Remove the damaged board and any wet insulation, and bag mouldy material before carrying it through the house.
Dry the exposed cavity with fans and a dehumidifier until the studs and remaining board read dry on a moisture meter.
- Cut a replacement board to fit, screw it to the studs, and tape the joints.
- Apply joint compound in thin coats, sanding lightly between coats, then prime with a stain-blocking primer.
- Repaint the whole wall, not just the patch, so the finish matches.
Mold Behind Drywall: When the Repair Becomes a Health Job
Mould can start growing on damp drywall paper within 24 to 48 hours, and once it is established inside a wall cavity it releases spores into the room every time the air moves. Small areas of surface mould can sometimes be handled by a careful homeowner wearing gloves, eye protection and a proper respirator, with the room sealed off and the material bagged before removal. But mould spread across a large area, mould that returns after cleaning, or mould in a home where someone has asthma, allergies or a weakened immune system is a job for a remediation professional.
As a practical rule, mould covering more than about 10 square feet, mould inside heating or ventilation ducts, or any mould you suspect is linked to sewage or contaminated water should be left to specialists. They can contain the area under negative pressure, remove the material safely and dry the structure properly. Whatever the scale, never dry-brush or vacuum mould with a household vacuum — that spreads spores through the house instead of removing them.
Drywall Water Damage Repair Costs and What Changes Them
Costs vary widely because the price is driven by how much wall has to come out, not by the size of the stain you can see. As a broad guide, drying out and patching a small, isolated area is the cheapest outcome, while cutting out and replacing a full wall, including insulation, framing repairs and repainting, costs several times as much. Mould remediation, plumbing repairs and finishing work each add to the bill, and damage discovered late — after framing has rotted or flooring has swollen — is where costs climb fastest. The cheapest repair is always the early one: a moisture meter and an hour of investigation cost far less than a rebuilt wall.
Keeping Drywall Dry After the Repair
A repair that does not fix the conditions that caused the damage will fail again, so prevention is part of the job. Keep gutters and downspouts clear and discharging well away from the walls, keep the ground sloping away from the house, and reseal around windows, baths and showers before gaps become leaks. Inside, keep bathroom and kitchen extractor fans working, watch the flexible hoses behind washing machines and dishwashers, and check under sinks every few months. In humid rooms, keeping relative humidity below about 60 percent makes mould far less likely to return.
- Inspect under sinks and behind appliances every three to six months.
- Replace washing machine and dishwasher hoses before they age and split.
- Keep gutters clear and downspouts discharging away from the foundation.
- Run extractor fans during and after showers and cooking.
- Fix dripping taps and running toilets promptly instead of living with them.
Final Thoughts: Catching Drywall Water Damage Early Saves the Wall and the Wallet
Water behind drywall rewards the homeowner who notices small changes and acts on them. A stain, a smell or a soft spot is not a cosmetic problem — it is the wall telling you that water is where it should not be. Confirm what you find, stop the leak, dry the structure properly and replace what cannot be saved, and the repair stays a repair instead of becoming a renovation.
Drywall Water Damage FAQs
Can water-damaged drywall dry out on its own?
Only if the wetting was brief and the board stayed firm. A board that dried quickly after a one-off spill may survive, but if it is soft, sagging or stained through, drying will not restore its strength and it should be replaced.
How long does it take for mould to grow behind drywall?
Mould can begin growing on damp drywall paper within 24 to 48 hours. That short window is why fast drying matters more than fast decorating — the wall must be dry before it is sealed up again.
Is a small water stain on drywall a serious problem?
A stain that is dry, stable and explained by a leak that has already been fixed is usually cosmetic. A stain that grows, darkens or feels damp is active and needs investigation before you paint over it.
Should I cut into the wall to check for water damage?
Start with non-destructive checks such as a moisture meter, a thermal camera and the foil test. If those confirm moisture, cut a small inspection opening near the baseboard so you can see the cavity without removing a whole sheet.
Can I paint over a water stain on drywall?
Only after the leak is fixed and the wall is fully dry, and only with a stain-blocking primer first. Ordinary paint will not seal a stain, and the brown mark will bleed through within weeks.
When should I call a professional for drywall water damage?
Call one when the damage covers a large area, when mould is extensive, when framing may be affected, or when you cannot find the leak. Restoration professionals can map the moisture, dry the structure and remove mould safely.